Correct Depth for Planting Tulip Bulbs
Ever wondered why your neighbor’s tulips burst forth in a spectacular display each spring, while yours seem to struggle, or worse, never appear at all? Could it be something as fundamental as the depth at which you’re planting tulip bulbs? It’s a question many gardeners ponder, and the answer, often overlooked, holds the key to a vibrant, healthy tulip patch. Data shows that improper planting depth is a leading cause of poor tulip performance, affecting up to 35% of cultivated bulbs annually. This seemingly small detail plays an enormous role in root development, temperature regulation, and ultimately, the dazzling bloom you anticipate. Getting the depth right for your planting tulip bulbs flower isn’t just a recommendation; it’s a foundational step towards garden success, significantly reducing instances of “blind” tulips (those that fail to flower) and extending their perennial life. Let’s dig into the precise science and art behind successful tulip cultivation, ensuring your efforts flourish.
Table of Contents
Tools & Soil Requirements
Before you even think about putting a shovel in the ground, gathering the right tools and preparing your soil are paramount for successful planting tulip bulbs.
- Trowel or Bulb Planter: Essential for digging individual holes to the correct depth. A bulb planter can save your back and ensure consistent depth, especially for larger quantities.
- Gardening Gloves: Protect your hands from soil and potential irritants.
- Soil Test Kit: Highly recommended. Understanding your soil’s pH and nutrient levels is crucial. Tulips prefer a slightly acidic to neutral pH (6.0-7.0).
- Compost or Well-rotted Manure: For enriching the soil. Organic matter improves drainage and provides essential nutrients.
- Bone Meal: A natural source of phosphorus, which encourages strong root development, vital for robust planting tulip bulbs.
- Rake: For leveling the soil surface after planting.
Soil Type: Tulips thrive in loamy, well-draining soil. This means a balanced mix of sand, silt, and clay, which retains moisture but doesn’t become waterlogged. Heavy clay soils can suffocate bulbs, while overly sandy soils drain too quickly. If you have heavy clay, incorporate liberal amounts of compost and grit. For sandy soil, add compost to improve water retention.
Climate Conditions: Tulips require a period of dormancy, experiencing cold temperatures for several weeks to initiate flowering. They are typically planted in USDA Hardiness Zones 3-8. In warmer climates (Zones 9-10), consider pre-chilled bulbs or treating them as annuals.
Best Planting Season & Timing
Timing is everything when planting tulip bulbs. The optimal window is fall, when soil temperatures have cooled but before the ground freezes solid. This typically means September to November in most temperate climates. Planting too early, when the soil is still warm, can encourage fungal diseases, while planting too late can prevent proper root development before winter.
- Ideal Soil Temperature: Aim for soil temperatures consistently below 60°F (15°C) but above freezing. This allows the bulbs to establish roots before going dormant.
- Germination Time: Tulip bulbs don’t “germinate” in the traditional sense like seeds. Instead, they root over the fall and winter. Visible sprouts typically emerge in early spring, usually within 2-4 weeks after the last frost.
- Time to Maturity (Bloom): Depending on the variety and local climate, tulips generally bloom from early to late spring, typically 5-10 weeks after the first leaves appear. Early varieties might bud in March, while late bloomers can extend into May. This is roughly 25% faster to bloom than many other spring-flowering bulbs, offering a quick splash of color.
Step-by-Step Planting Instructions
Ready to transform your garden? Here’s how to ensure your planting tulip bulbs creates a dazzling display:
Step 1: Choose Your Perfect Spot and Prepare the Soil
Select a location that receives at least 6 hours of direct sunlight daily during spring. Clear the area of weeds and debris. Dig the soil to a depth of at least 10-12 inches (25-30 cm) and amend with compost. Work in bone meal if your soil test indicates a phosphorus deficiency. This rich, inviting bed is where your tulips will truly thrive.
Step 2: Digging the Ideal Hole Depth
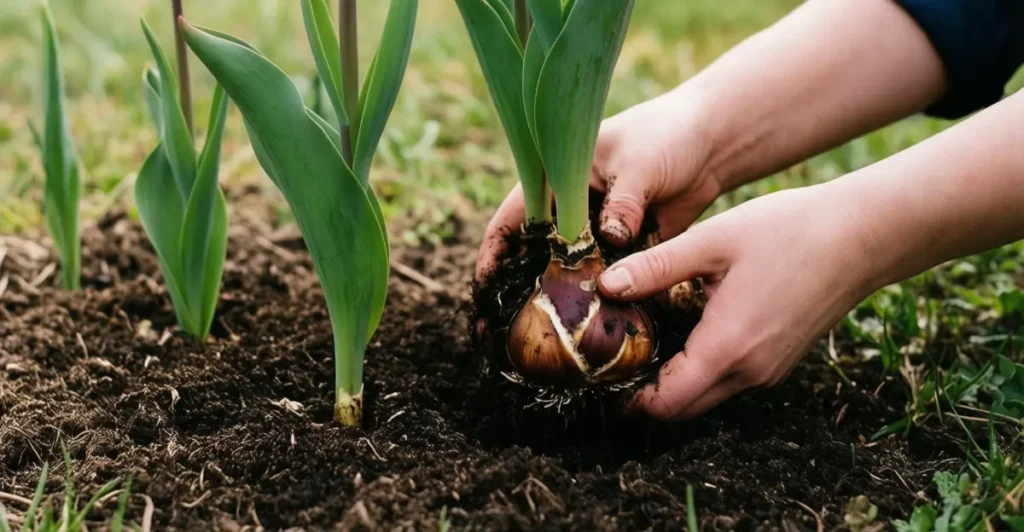
This is arguably the most critical step for planting tulip bulbs. A general rule of thumb is to plant bulbs two to three times their height deep. For most standard tulip bulbs, this translates to 6-8 inches (15-20 cm) deep. For larger varieties, go a bit deeper, up to 10 inches (25 cm). Dig the hole wide enough to comfortably accommodate the bulb without disturbing its structure. This optimal depth protects the bulb from temperature fluctuations and creates a sturdy anchoring point.
Step 3: Proper Bulb Orientation
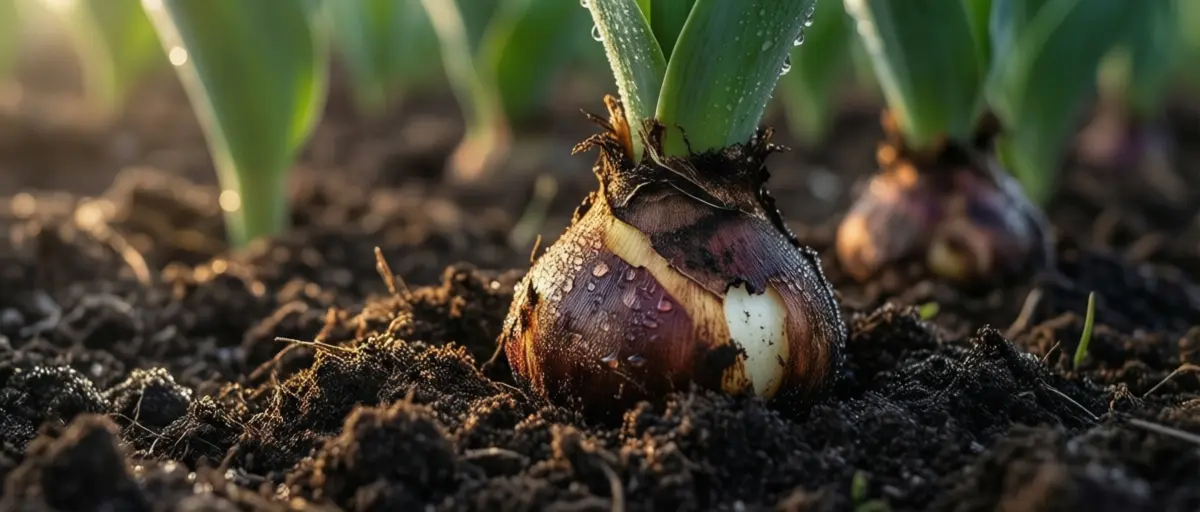
Place each tulip bulb in the hole with the pointy side facing upwards. This is where the sprout will emerge. The flatter, often hairy side, is the base where the roots will develop. If you’re unsure which end is which, planting the bulb on its side is often sufficient as gravity will guide the sprout upwards, though it might take slightly more energy from the bulb.
Step 4: Spacing for Impact
Space tulip bulbs 4-6 inches (10-15 cm) apart for a mass effect. For a more natural look, you can plant them in informal drifts. Avoid planting them too close, as this can lead to competition for nutrients and air circulation, potentially reducing bloom quality. Imagine the vibrant tapestry you’re weaving as you delicately space each bulb.
Step 5: Gently Backfill and Water
Once the bulbs are in place, gently backfill the holes with the amended soil, lightly tamping it down to remove air pockets. Avoid compacting the soil too firmly. Water thoroughly immediately after planting. This helps settle the soil around the bulbs and kickstarts root development. You’re giving them their first drink, a refreshing welcome to their new home.
Step 6: Mulch for Protection (Optional but Recommended)
Apply a 2-3 inch (5-7.5 cm) layer of organic mulch (e.g., straw, shredded leaves, wood chips) over the planted area after the ground begins to freeze. This insulates the soil, protects the bulbs from extreme cold, and helps suppress weeds. It’s like tucking them into a cozy blanket for winter.
Plant Care Essentials
Once your planting tulip bulbs are in the ground, proper care ensures a spectacular spring display.
- Water Needs: Tulips require consistent moisture, especially during their active growth period in spring. Water deeply once a week if rainfall is insufficient. Avoid overwatering once foliage begins to die back, as this can lead to rot. During dormancy (summer), they prefer dry conditions.
- Sunlight Requirements: Full sun is ideal for tulips, meaning at least 6 hours of direct sunlight per day. If they receive too little sun, stems can become leggy, and blooms might be sparse or lackluster.
- Temperature Tolerance: Tulips are remarkably cold-hardy, requiring a chilling period (typically 12-16 weeks at 40-50°F / 4-10°C) to flower. They tolerate freezing temperatures well once dormant. Most varieties thrive in USDA Zones 3-8.
- Fertilization: While not strictly necessary if your soil is rich, a balanced, slow-release bulb fertilizer can be applied in early spring when sprouts first emerge. Avoid high-nitrogen fertilizers, which promote leafy growth over flowers.
Best Varieties & Companion Plants
Choosing the right tulip varieties and companion plants can elevate your garden from pleasant to breathtaking, while also boosting the health of your planting tulip bulbs flower.
Disease-Resistant & Easy-to-Grow Varieties:
- ‘Darwin Hybrid’ Tulips: Known for their robust nature, large flower heads, and strong stems. They often naturalize well, returning for several years. Varieties like ‘Apeldoorn’ or ‘Red Impression’ are classic choices.
- ‘Triumph’ Tulips: A huge group offering a vast array of colors and strong disease resistance. They are excellent for cutting and reliable performers.
- ‘Fosteriana’ Tulips (Emperor Tulips): Early-blooming, very hardy, and often have vibrant, large flowers. ‘Orange Emperor’ or ‘Pink Emperor’ are striking.
- ‘Species’ Tulips (Botanical Tulips): These are wilder, smaller, and incredibly resilient. They naturalize easily and don’t require yearly replanting. Excellent for rock gardens or naturalized areas.
Creative Companion Planting Ideas:
Companion planting isn’t just about aesthetics; it’s about creating a thriving ecosystem.
- Daffodils (Narcissus): Excellent companions! Their foliage develops around the same time, and many varieties are deer and rodent resistant, subtly protecting your susceptible tulips.
- Muscari (Grape Hyacinth): These charming blue spires bloom concurrently with early tulips, creating a dense, colorful carpet beneath them. They also deter rodents with their scent.
- Alliums: Ornamental onions bloom later than most tulips but provide architectural interest and are fantastic pest deterrents (aphids, deer, rodents) due to their sulfurous compounds.
- Hyacinths: Their intense fragrance can help mask the appealing scent of tulips from pests, and their dense flower spikes offer a beautiful textural contrast.
- Underplant with Annuals: Once tulip foliage begins to fade, you can plant shallow-rooted annuals like pansies, violas, or lobelia to fill the space and provide continuous color without disturbing the dormant bulbs beneath.
Landscape Uses & Harvest Tips
The versatility of planting tulip bulbs allows for diverse and enchanting landscape designs, and while not typically “harvested” for consumption, understanding bloom longevity is key.
Creative Landscape Uses:
- Borders & Edging: Plant single rows or drifts along pathways, garden beds, or house foundations for clear definition and a burst of spring color. Think about contrasting colors for maximum impact.
- Mass Plantings: Group hundreds of tulips of the same variety and color for an utterly breathtaking, show-stopping display. This is the Dutch approach!
- Containers & Pots: Tulips thrive in containers, making them perfect for patios, balconies, or urban spaces. Layer different heights for a “lasagna planting” effect, ensuring continuous blooms. Remember to choose wider, deeper pots for optimal root development.
- Naturalized Areas: For species tulips, allow them to multiply and spread in lawns, under deciduous trees, or in meadows for a wild, enchanting look.
- Cutting Garden: Plant a dedicated section for cutting varieties (like Darwin Hybrids or Triumph tulips) to bring the beauty indoors. Stagger planting times to ensure a longer bloom season for fresh bouquets. Imagine fresh, vibrant bouquets gracing your dining table every week of spring.
Harvest Tips for Cut Flowers:
- Timing: Cut tulips in the early morning when the flowers are still somewhat closed but beginning to show color.
- Cutting Technique: Use a sharp knife or shears to cut stems at an angle, leaving at least two sets of leaves on the plant to help the bulb photosynthesize for next year.
- Preparation: Immediately place cut stems in a bucket of cool water. They will continue to grow in the vase! Adding floral preservative can extend their vase life significantly. Recut stems and change water daily for the freshest display.
Common Pests & Diseases to Avoid
Protecting your planting tulip bulbs from common adversaries ensures a healthy and long-lasting display. Prevention is always easier than cure.
- Aphids: Small, soft-bodied insects that cluster on new growth and flower buds, sucking sap.
- Prevention/Treatment: Blast them off with strong jets of water, use insecticidal soap, or introduce natural predators like ladybugs.
- Slugs and Snails: They chew holes in leaves and petals.
- Prevention/Treatment: Handpick them at dusk or dawn, use beer traps, or apply organic slug baits. Keeping the area free of excess debris reduces their hiding spots.
- Rodents (Volas, Mice, Squirrels): The bane of many a tulip grower, as they love to dig up and eat bulbs. Statistics show rodents are responsible for up to 40% of early-season tulip bulb losses in some areas.
- Prevention/Treatment: Plant bulbs in wire cages (hardware cloth), mix grit or crushed oyster shells into the planting hole, or interplant with rodent-repellent bulbs like daffodils or fritillaria. Castor oil sprays can also deter them.
- Tulip Fire (Botrytis Blight): A fungal disease that causes brown spots on leaves, stems, and flowers, eventually leading to rot. It’s especially prevalent in wet, humid conditions.
- Prevention/Treatment: Ensure good air circulation by proper spacing. Remove and destroy infected plant parts immediately. Avoid overhead watering. Plant in well-draining soil. Fungicides can be used as a last resort.
- Narcissus Bulb Fly: Lays eggs near the base of the bulb; larvae then burrow into and consume the bulb from the inside.
- Prevention/Treatment: Inspect bulbs carefully before planting. Keep the area around bulbs clear of debris to expose flies. Covering bulbs with fine netting can prevent egg-laying.
- Tulip Breaking Virus: Causes irregular color stripes or streaks on petals, weakening the plant.
- Prevention/Treatment: This virus is spread by aphids. Remove and destroy infected plants immediately to prevent spread. There is no cure.
Seasonal Maintenance & Overwintering
Ensuring the longevity and spectacular return of your planting tulip bulbs requires year-round attention, not just spring admiration.
Spring:
- Deadhead Spent Blooms: Once a tulip flower fades, snip off the flower head (deadhead) to prevent the plant from putting energy into seed production. This energy is then redirected back into the bulb, strengthening it for next year. Leave the stem and foliage intact.
- Consistent Watering: Continue deep watering if spring rains are infrequent, especially as the plants are actively growing and blooming.
Summer (Post-Bloom Care):
- Allow Foliage to Die Back Naturally: This is arguably the most crucial step for perennializing tulips. Resist the urge to cut back yellowing or browning leaves. The foliage synthesizes energy through photosynthesis, feeding the bulb for next year’s bloom. Wait until the leaves are completely yellow and easily pull away from the stem (typically 6-8 weeks after flowering) before removing them.
- Reduce Watering: As foliage dies back, reduce watering to allow the bulbs to enter dormancy in dry conditions, which helps prevent rot.
- Lifting and Storing (Optional): In areas with very wet summers or where you want to prevent overcrowding, you can lift bulbs after the foliage has died back. Gently dig them up, clean off soil, allow them to air dry for a few days, and store them in a cool, dry, dark, well-ventilated spot (e.g., mesh bags, onion sacks) until fall planting. This is often recommended for many hybrid varieties to maintain vigor.
Fall:
- Replant Lifted Bulbs: If you lifted bulbs, this is the time to replant them following the same depth and spacing guidelines.
- Fertilize (Optional): Apply a slow-release, low-nitrogen fertilizer or bone meal to established beds to replenish nutrients for the upcoming year’s growth.
- Mulch: Apply a protective layer of mulch once the soil has cooled but before it freezes solid.
Winter:
- Dormancy: Your tulips are sound asleep, undergoing their vital chilling period. Ensure they remain undisturbed.
Conclusion
Mastering the art of planting tulip bulbs is a journey filled with rewarding bursts of color and the satisfaction of nurturing life from the ground up. From selecting the perfect spot and enriching your soil to ensuring that critical planting depth and providing consistent care, each step contributes to a stunning spring display. Remember, the seemingly small detail of planting 6-8 inches deep can be the difference between a sparse garden and one overflowing with vibrant hues. By embracing these data-backed strategies and personalized tips, you’re not just planting bulbs; you’re cultivating joy, beauty, and a deeper connection with your garden.
Are you ready to transform your spring garden into a masterpiece? Don’t just dream of a riot of color – make it a reality! Share your planting tulip bulbs flower success stories and photos in the comments below. What are your favorite varieties, or perhaps a unique planting tip you’ve discovered? Dive deeper into the world of flowering bulbs with our guide to “Spring Bulb Combinations That Wow!” or explore “Organic Pest Control for Your Flower Garden.” Let’s grow something beautiful together!
FAQs
Q1: What happens if I plant tulip bulbs too shallow?
A1: Planting too shallow (less than 6 inches deep) leaves bulbs vulnerable to temperature fluctuations, rodent damage, and drying out. This often results in weak stems, smaller blooms, or even no flowers at all in subsequent years, as the bulb has less energy to store.
Q2: Can I plant tulip bulbs in pots?
A2: Absolutely! Tulips are excellent for container planting. Ensure your pot is at least 10-12 inches deep and has drainage holes. Plant bulbs at the recommended depth, but you can layer them (lasagna planting) closer together in pots for a denser display. Remember that container bulbs need more frequent watering and may require overwintering protection in very cold climates.
Q3: How often do I need to water newly planted tulip bulbs?
A3: Immediately after planting tulip bulbs, water thoroughly to settle the soil. After that, generally, supplemental watering is not needed until spring when new growth emerges, unless you live in an exceptionally dry climate. Fall and winter rains are usually sufficient during their dormancy period.
Q4: Do I need to fertilize my tulip bulbs every year?
A4: Not necessarily. If your soil is rich in organic matter, annual fertilization might not be needed. However, applying a balanced, slow-release bulb fertilizer or bone meal in early spring as new shoots emerge can boost flower production, especially for tulips you wish to naturalize and have return year after year.
Q5: My tulips didn’t bloom this year – what went wrong?
A5: Several factors can cause “blind” tulips. Common causes include: not enough chilling period (especially in warmer climates), improper planting depth (too shallow or too deep), insufficient sunlight, heavy clay soil, premature cutting of foliage last year, or rodent damage. Review your planting and care routine to identify potential issues.
Q6: Should I deadhead tulips after they bloom?
A6: Yes, deadheading is recommended. Snip off the faded flower head to prevent seed formation, which diverts energy from the bulb. This redirects the plant’s energy into the bulb, strengthening it for a better bloom the following year. However, always leave the foliage intact until it yellows and dies back naturally.