Propagating the Airplane Plant: The Easiest Way to Grow New Spider Plants
Table of Contents
Are you looking to multiply your favorite houseplants? Propagating Chlorophytum comosum, commonly known as airplane or spider plants, is a straightforward process that allows you to grow new plants with ease. This method is not only simple but also highly effective, making it a great way to share plants with friends or expand your indoor garden.

Propagating spider plants is a rewarding experience, and with the right guidance, you can successfully grow new plants. In this article, we’ll walk you through the steps to propagate your airplane plants and provide you with the knowledge to become a pro.
Key Takeaways
- Learn the simple steps to propagate Chlorophytum comosum
- Understand the benefits of propagating spider plants
- Discover how to care for newly propagated plants
- Get tips on how to share your new plants with friends
- Expand your knowledge on indoor gardening with spider plants
Understanding Spider Plants and Their Characteristics
Spider plants, known scientifically as Chlorophytum comosum, are one of the most popular houseplants due to their ease of care and propagation. These plants are not only beautiful but also offer a range of benefits for indoor spaces.
What Are Spider Plants (Chlorophytum Comosum)?
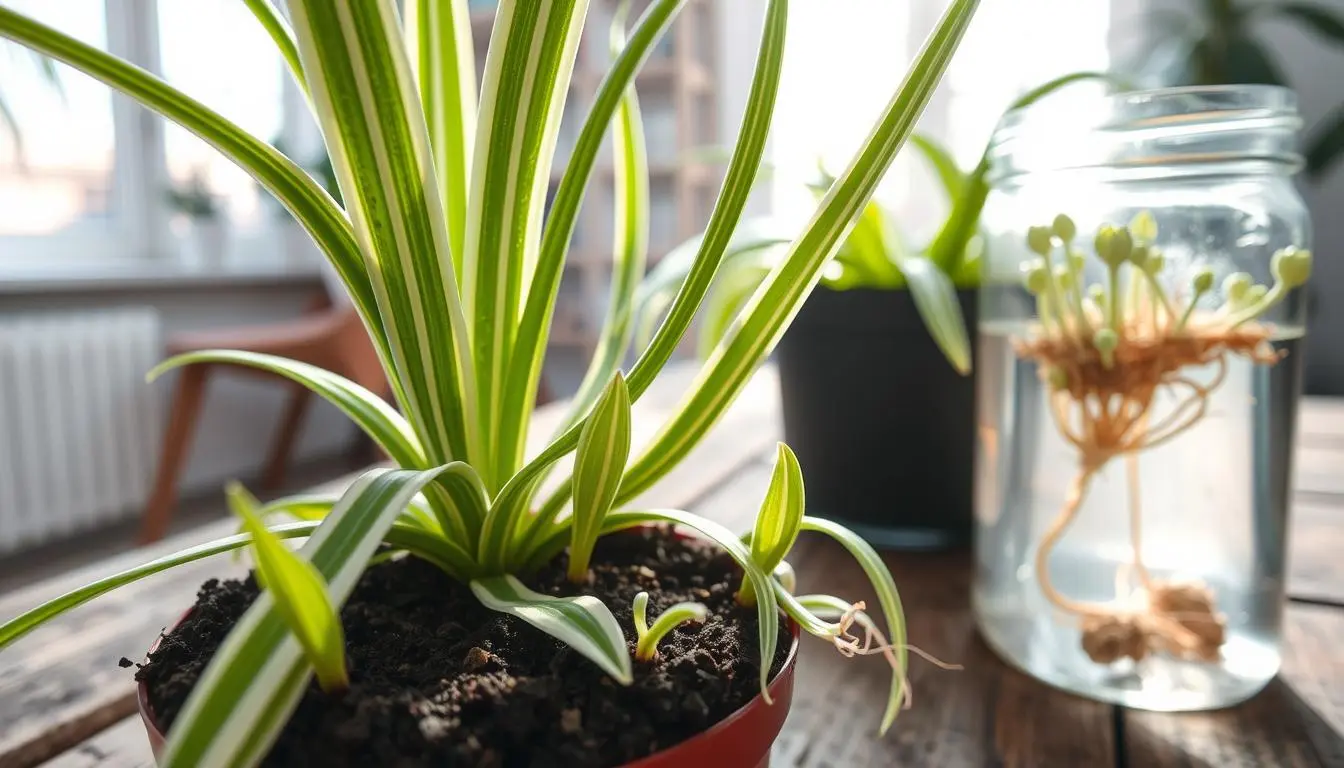
Spider plants are a type of flowering plant native to South Africa. They are characterized by their long, thin leaves that grow in a rosette pattern, making them a visually appealing addition to any room. Their ability to produce ‘spiderettes’ or baby plants on the ends of their stems is a unique feature that makes them easy to propagate.
The Life Cycle of Spider Plants
The life cycle of spider plants involves several stages, from mature plants producing flowers and subsequently ‘spiderettes,’ to the development of new plants. Understanding this cycle is key to successfully propagating and caring for these plants.
| Stage | Description |
| Mature Plant | Produces flowers and ‘spiderettes’ |
| Flowering | Small white flowers appear on long stems |
| ‘Spiderettes’ | Baby plants form on the ends of stems |
Why Spider Plants Are Perfect for Beginners
Spider plants are ideal for those new to plant care because they are low maintenance and forgiving. They can thrive in a variety of lighting conditions and are relatively pest- and disease-free, making them a great choice for beginners.
By understanding the characteristics of spider plants, you can better appreciate why they are a favorite among plant enthusiasts. Their unique features and ease of care make them an excellent choice for anyone looking to start or expand their indoor garden.
All About the Spider Plant Flower and Plantlets
The spider plant’s unique flowering process is a precursor to its remarkable ability to produce new plants. As a spider plant matures, it begins to produce flowers, typically on long stems that can extend quite a distance from the mother plant.
How Spider Plant Flowers Develop
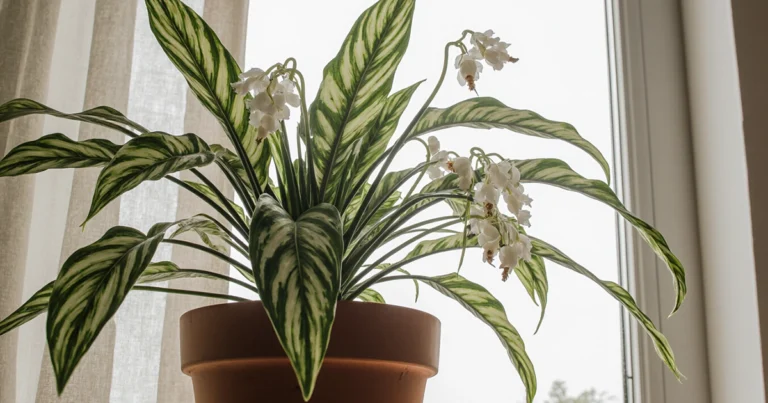
Spider plant flowers are small, white, and often appear in clusters on the ends of long stems. These flowers are a sign that the plant is healthy and ready to propagate. The flowering process is a natural part of the plant’s life cycle, and with proper care, the flowers will eventually develop into plantlets.
From Flowers to Plantlets: The Natural Propagation Process
After the flowers have bloomed, they will begin to develop into plantlets. This process can take several weeks to a few months, depending on the health of the plant and environmental conditions. The plantlets will grow leaves and roots, eventually becoming miniature versions of the mother plant.
When Plantlets Are Ready for Propagation
To determine if a plantlet is ready for propagation, check for the presence of roots and a few sets of leaves. Once the plantlet has developed its own root system and is visibly thriving, it’s ready to be separated from the mother plant. This is an exciting step in how to care for spider plants, as it allows you to create new plants.
By understanding the process of flowering and plantlet development, you can better care for your spider plants and successfully propagate new ones. This knowledge is essential for any plant enthusiast looking to expand their collection or share plants with friends.
Step-by-Step Guide to Propagating Spider Plants
Propagating spider plants is a straightforward process that can be accomplished using various methods. Whether you’re a beginner or an experienced gardener, you’ll find that spider plants are easy to propagate and care for.
Preparing Your Propagation Materials
Before you start propagating your spider plants, it’s essential to gather the necessary materials. You’ll need a few basic supplies, including a pot or container, water, a well-draining soil mix, and a sharp, clean knife or pruning tool.
- A clean pot or container with drainage holes
- Water
- A well-draining soil mix specifically designed for indoor plants
- A sharp, clean knife or pruning tool
Water Propagation Method
The water propagation method is a popular choice for spider plants, as it’s easy and effective. To propagate using water, you’ll need to set up a container with water and monitor root development.
Setting Up Your Container
Fill a clean glass or container with lukewarm water, making sure to leave enough space at the top. Gently place the spider plant cutting or plantlet into the water, ensuring that the node is fully submerged.

Keep the water level topped up and wait for roots to develop. You’ll start to see roots growing within a few days to a week, depending on the plant’s health and conditions.
Direct Soil Propagation Method
If you prefer to propagate your spider plants directly in soil, this method is also effective. To do so, you’ll need to choose the right soil mix and follow proper planting and initial care procedures.
Choosing the Right Soil Mix
Select a well-draining soil mix that’s specifically designed for indoor plants. Avoid using regular garden soil, as it can compact and prevent proper root growth.
Planting and Initial Care
Plant the spider plant cutting or plantlet in the soil mix, gently firming the soil around the roots. Water thoroughly and keep the soil consistently moist during the initial establishment period.
Propagation While Attached to the Mother Plant
Another method is to propagate spider plants while they’re still attached to the mother plant. This approach allows the new plantlets to develop their own roots while still receiving nutrients from the mother plant.
Division of Mature Plants
For mature spider plants, division is a viable propagation method. Carefully remove the plant from its pot, gently separating the roots and re-potting the separated sections into new containers.
By following these step-by-step guides, you’ll be able to successfully propagate your spider plants using the method that suits you best.
Complete Care Guide for Newly Propagated Spider Plants
After successfully propagating your spider plants, the next crucial step is to provide them with the right care to ensure they thrive. Proper care will help your new plants establish a strong root system and grow into healthy, robust spider plants.
Watering Requirements for New Plants
Watering is a critical aspect of caring for newly propagated spider plants. Keep the soil consistently moist but not waterlogged. Overwatering can lead to root rot, while underwatering can cause the leaves to turn brown. Check the soil moisture by sticking your finger into the soil up to the first knuckle; if the soil feels dry, it’s time to water.
Light and Temperature Needs
Spider plants prefer bright, indirect light but can tolerate a range of lighting conditions. Avoid direct sunlight, which can cause the leaves to become scorched. In terms of temperature, spider plants thrive in temperatures between 60°F to 80°F (15°C to 27°C). Avoid placing them near heating or cooling vents, fireplaces, or drafty windows.
Fertilizing Young Spider Plants
Fertilizing your spider plants will promote healthy growth. Use a balanced, water-soluble fertilizer (20-20-20) during the growing season (spring and summer). Dilute the fertilizer to half the recommended strength to avoid burning the roots. You can fertilize your spider plants once a month, but skip fertilizing during the dormant season (fall and winter).
When and How to Transplant
Once your newly propagated spider plant has outgrown its container, it’s time to transplant it into a larger pot. Choose a pot that is only slightly larger than the current one, as spider plants prefer to be slightly root-bound. Use a well-draining potting mix to prevent waterlogged soil.
Can Spider Plants Live Outside?
Spider plants can live outside in warm climates, but they are typically grown as houseplants in most regions. If you live in a frost-free area (USDA Hardiness Zones 9-11), you can grow spider plants outdoors in a shaded or partially shaded location. In cooler climates, bring your spider plants indoors during the winter months to protect them from frost.
Troubleshooting Common Issues with New Plants
Common issues with newly propagated spider plants include yellowing leaves, brown tips, and pests like spider mites or mealybugs. Check your plants regularly for signs of pests or disease, and take action promptly if you notice any issues. Adjust your watering and fertilizing schedule as needed to prevent problems.
- Yellowing leaves: Overwatering or underwatering
- Brown tips: Dry air or overfertilization
- Pests: Inspect plants regularly and treat promptly
Conclusion
You now have the knowledge to propagate spider plants successfully. With the right care, you can enjoy a thriving collection of these beautiful plants. The spider plant flower is a sign that your plant is ready to produce new plantlets, making it easy to share or expand your indoor garden.
By following the steps outlined, you can ensure that your newly propagated spider plants receive the care they need to flourish. Whether you’re a seasoned gardener or just starting out, spider plants are a great choice for anyone looking to bring some greenery into their home.
FAQ
What is the ideal temperature for spider plants?
Spider plants prefer temperatures between 60°F to 80°F (15°C to 27°C), making them comfortable in typical indoor environments.
How often should I water my spider plant?
Water your spider plant when the top inch of soil feels dry to the touch, usually every 7-10 days in the spring and summer, and less frequently in the fall and winter.
Can I propagate spider plants in soil directly?
Yes, you can propagate spider plants directly in soil by planting the plantlets about 1-2 inches deep in a well-draining potting mix and keeping the soil moist until roots develop.
How much light do spider plants require?
Spider plants prefer bright, indirect light but can tolerate a range of light conditions, from partial shade to full sun, although direct sunlight can cause leaf scorch.
Are spider plants toxic to pets?
Spider plants are non-toxic to cats and dogs according to the ASPCA, making them a great choice for pet owners, but it’s still possible for pets to experience gastrointestinal upset if they ingest a large amount of plant material.
Can spider plants live outside year-round?
In USDA Hardiness Zones 9-11, spider plants can live outside year-round, but in cooler climates, they are typically grown as houseplants or brought indoors during the winter months to protect them from frost.
How do I fertilize my spider plant?
Feed your spider plant with a balanced, water-soluble fertilizer during the growing season (spring and summer), diluting the fertilizer to half the recommended strength to avoid burning the roots.
Why are my spider plant’s leaves turning yellow?
Yellowing leaves on a spider plant can be caused by overwatering, underwatering, or exposure to extreme temperatures; adjusting your care routine should help resolve the issue.