How to Grow a Curry Leaf Plant Indoors: Your Complete Guide to Fresh, Aromatic Leaves Year-Round
Picture this: You’re standing in your kitchen, about to prepare your favorite dal or sambhar. You reach for the curry leaves, only to find a sad packet of dried, flavorless substitutes. The disappointment hits hard because you know that authentic flavor that irreplaceable citrusy, aromatic punch only comes from fresh leaves. What if you could change this scenario forever? What if your kitchen window could host a thriving curry leaf plant that delivers fresh, vibrant leaves whenever your recipes demand them?
Growing a curry leaf plant indoors isn’t just practical; it’s transformative. You’re not simply cultivating another houseplant; you’re bringing an essential piece of culinary heritage into your living space. Whether you’re navigating life in a small apartment, dealing with harsh winters, or simply craving that connection to traditional cooking, indoor cultivation makes it possible to enjoy fresh curry leaves without compromise.
The journey from novice plant parent to confident curry leaf cultivator might seem daunting, but thousands of home gardeners have discovered that these aromatic wonders thrive beautifully indoors when given proper care. This comprehensive guide walks you through every step, from selecting your first plant to harvesting abundant leaves while naturally deterring pests and maximizing yields.
Table of Contents
Understanding Your Curry Leaf Plant: Building a Strong Foundation
Before your hands touch soil, understanding what makes the curry leaf plant special sets you up for success. Scientifically known as Murraya koenigii, this tropical beauty originates from the Indian subcontinent, where it grows naturally in warm, humid conditions. Don’t confuse these aromatic leaves with curry powder—they’re distinctly different, though both enhance your cooking magnificently.
Your curry leaf plant belongs to the citrus family, which explains its distinctive fragrance and glossy, compound leaves. Each stem typically carries 11-21 small leaflets arranged in pairs, creating that recognizable feathery appearance. When you crush these leaves between your fingers, volatile oils release instantly, filling your space with that unmistakable aroma that signals authentic South Asian cuisine.
Beyond flavor, these leaves pack impressive nutritional benefits. They’re loaded with vitamins A, B, C, and E, along with minerals like calcium, iron, and phosphorus. Traditional medicine systems have utilized curry leaves for centuries to support digestion, manage blood sugar, and promote hair health. When you grow your curry leaf plant indoors, you’re cultivating both a culinary staple and a wellness ally.
Getting Started: Essential Requirements for Indoor Success
Your curry leaf plant journey begins with one crucial decision: how you’ll start. You have three main options, each with distinct advantages. Starting from seeds offers the most economical route, but demands patience—you’ll wait two to three years before substantial harvests. Seeds also have frustratingly low germination rates, often below fifty percent, and viability decreases rapidly after harvest.
Purchasing a young sapling represents the sweet spot for most beginners. You’ll spend fifteen to thirty dollars typically, but you’re buying time and reliability. A healthy sapling reaches harvestable size within six to twelve months, with success rates hovering around eighty to ninety percent. Look for specimens with vibrant green leaves, sturdy stems, and visible root development when shopping.
Stem cuttings offer a middle ground, particularly if you know someone with an established plant. This method costs virtually nothing beyond rooting hormone (optional) and takes eight to sixteen months to produce harvest-ready plants. Success rates land between sixty and seventy percent with proper technique.
When shopping for your curry leaf plant, prioritize reputable sources. Local nurseries specializing in tropical plants often carry healthy specimens and provide valuable growing advice. Online retailers expand your options, though carefully research seller reviews before purchasing. Indian and Asian grocery stores sometimes stock young plants, offering convenient access if you’re already shopping for ingredients.
Light: The Make-or-Break Factor
Your curry leaf plant’s success hinges primarily on adequate lighting. These sun-loving tropicals demand minimum six to eight hours of bright, indirect sunlight daily. Without sufficient light, your plant becomes leggy, drops leaves, and produces minimal growth despite your best efforts elsewhere.
South-facing windows in the Northern Hemisphere provide ideal conditions, delivering consistent, bright light throughout most of the day. West-facing windows work well too, though afternoon intensity might require some filtering during peak summer months. East-facing windows offer gentler morning light, which can suffice if particularly bright, but north-facing exposures rarely provide adequate illumination.
Watch your plant carefully for light-related signals. Yellowing leaves that drop prematurely often indicate insufficient light, as does stretching growth with long spaces between leaf nodes. Conversely, leaves developing brown, crispy patches suggest too much direct, intense sun exposure.
When natural light falls short, supplemental grow lights bridge the gap effectively. LED grow lights deliver excellent results while consuming minimal electricity. Position them twelve to eighteen inches above your curry leaf plant, running them twelve to fourteen hours daily. Full-spectrum lights mimicking natural sunlight work best, supporting both vegetative growth and potential flowering.
Planting Your Curry Leaf Plant: Creating the Perfect Environment
Container selection matters more than many beginners realize. Start your sapling in an eight to ten-inch pot with adequate depth for root development. As your curry leaf plant matures, you’ll upgrade to twelve to sixteen-inch containers, eventually reaching eighteen to twenty inches for full-sized specimens. Size matters because cramped roots directly limit above-ground growth and leaf production.
Material choice impacts watering frequency and root health. Terracotta pots breathe beautifully, allowing excess moisture to evaporate through the porous clay. This quality helps prevent overwatering but means you’ll water more frequently. Ceramic pots offer similar benefits with more aesthetic variety. Plastic containers retain moisture longer—helpful if you travel frequently or forget watering occasionally, but requiring extra vigilance against waterlogging.
Drainage holes are absolutely non-negotiable. Without them, excess water accumulates at the bottom, creating anaerobic conditions that suffocate roots and encourage rot. If you’ve fallen in love with a decorative pot lacking drainage, use it as an outer cache pot, keeping your curry leaf plant in a properly draining inner container.
Create a drainage layer before adding soil. Place one to two inches of pebbles, broken pottery shards, or large bark pieces at the container bottom. This layer ensures water flows freely through the drainage holes rather than sitting in the soil, promoting healthy root conditions.
Crafting the Ideal Soil Mix
Your curry leaf plant thrives in well-draining, nutrient-rich soil that retains some moisture without becoming waterlogged. Standard potting soil alone won’t cut it—you need to enhance the mix for optimal results. Think of soil as your plant’s grocery store; the right combination provides both immediate nutrition and long-term support.
Start with forty percent high-quality potting soil as your base structure. Add twenty percent perlite or pumice for drainage and aeration—these volcanic materials create air pockets that prevent compaction. Incorporate twenty percent compost or worm castings for organic nutrition and beneficial microorganisms. Mix in ten percent cocopeat or peat moss for moisture retention and pH balance. Finally, add ten percent coarse sand to further improve drainage.
Consider beneficial amendments that serve dual purposes. Neem cake powder, added at one tablespoon per gallon of soil, provides slow-release nitrogen while deterring soil-dwelling pests. Bone meal contributes phosphorus for robust root development. These organic additions feed your curry leaf plant gradually while supporting overall soil health.
Aim for slightly acidic to neutral soil pH, ideally between 6.0 and 7.0. Most curry leaf plants tolerate slight variations, but extreme pH levels lock up nutrients, making them unavailable even when present. Test your soil annually using inexpensive pH meters or test strips, adjusting with sulfur (to lower pH) or lime (to raise pH) as needed.
The Planting Process
With your container and soil prepared, you’re ready to plant. Begin by adding a drainage layer, followed by enough soil mix to position your plant at the proper depth—the root crown should sit level with or slightly above the final soil line. Never bury the crown deeper than it grew previously, as this invites stem rot.
Center your curry leaf plant in the container, ensuring the stem stands straight. Fill around the root ball with your prepared soil mix, firming gently as you go to eliminate air pockets without compacting excessively. Leave approximately one inch of space between the soil surface and container rim—this reservoir prevents water from overflowing when you irrigate.
Water thoroughly after planting until liquid flows freely from drainage holes. This initial saturation settles the soil and ensures good root-to-soil contact. Place your newly potted curry leaf plant in a shaded or partially shaded location for two to three days before moving it to its permanent bright spot. This transition period reduces transplant shock, giving roots time to adjust before dealing with full light intensity.
Daily Care: Keeping Your Curry Leaf Plant Thriving
Watering represents the most common stumbling block for indoor curry leaf plant cultivation. These tropicals prefer consistently moist (but never soggy) soil during active growth, with slightly drier conditions during winter dormancy. The finger test provides your most reliable gauge—insert your finger one to two inches into the soil, watering only when this zone feels dry.
During summer and the active growing season, you’ll typically water every two to three days, depending on temperature, humidity, and light intensity. Hotter, brighter, and drier conditions accelerate moisture loss, demanding more frequent attention. Winter’s cooler temperatures and dormancy reduce water needs dramatically—once weekly or even less might suffice.
Use room temperature water when possible. Cold water shocks roots, temporarily stunning growth, while warm water promotes healthy uptake. Morning watering gives foliage time to dry before nightfall, reducing fungal disease risk. Pour slowly and evenly across the soil surface until water flows from drainage holes, ensuring thorough saturation of the root zone.
Learn to recognize watering-related warning signs early. Yellow leaves that drop readily often signal overwatering, as do mushy stems and fungal growth on the soil surface. Conversely, drooping foliage, crispy brown leaf edges, and widespread leaf drop indicate underwatering. Adjust your schedule based on these signals rather than adhering rigidly to a predetermined timetable.
Temperature and Humidity Management
Your curry leaf plant originates from tropical regions where temperatures remain consistently warm and humidity stays elevated. Recreating these conditions indoors maximizes growth and leaf production. Target temperatures between sixty-five and eighty-five degrees Fahrenheit for optimal results. Your plant tolerates brief dips to fifty degrees but suffers damage below this threshold.
Protect your curry leaf plant from temperature extremes and fluctuations. Avoid placing containers near heating vents that blast hot, dry air during winter or air conditioning units that create cold drafts in summer. Windows can present challenges too—cold glass in winter or intense heat buildup in summer can stress nearby plants.
Humidity between forty and sixty percent supports healthy growth. Unfortunately, most indoor environments, particularly during heating season, fall well below this range. Combat dry air with several strategies. Place your container on a pebble tray filled with water—as water evaporates, it creates a humid microclimate around your curry leaf plant. Mist foliage two to three times weekly using room temperature water. Group multiple plants together so their collective transpiration raises local humidity. Or invest in a humidifier, particularly beneficial if you’re cultivating multiple tropical species.
Feeding Your Curry Leaf Plant Naturally
Proper nutrition transforms adequate growth into abundant production. Your curry leaf plant benefits from regular feeding during the growing season, with reduced or eliminated fertilization during winter dormancy. Organic options provide slow, steady nutrition while building soil health—a win-win combination.
Compost tea delivers balanced, immediately available nutrients every two weeks during active growth. Steep finished compost in water for twenty-four to forty-eight hours, strain, and apply the resulting “tea” to moistened soil. This liquid gold contains beneficial microorganisms alongside nutrients, supporting both plant and soil ecosystem.
Fish emulsion, typically formulated around 5-1-1 (nitrogen-phosphorus-potassium), provides an excellent nitrogen boost monthly. This organic fertilizer promotes lush foliage growth—exactly what you want from a curry leaf plant. Dilute according to package directions, typically at half-strength for container plants, and apply to pre-moistened soil to prevent root burn.
Seaweed extract contributes trace minerals and compounds that enhance stress resistance. Apply bi-weekly as a foliar spray or soil drench. Your curry leaf plant absorbs nutrients directly through leaves when applied this way, while soil applications feed roots and beneficial organisms.
Banana peel tea offers homemade potassium supplementation every three weeks. Chop two to three banana peels, soak in a gallon of water for forty-eight hours, strain, and apply. Potassium supports flowering and fruiting—important if you hope to see your curry leaf plant produce its small white blooms and subsequent berries.
Epsom salt solution supplies magnesium, crucial for chlorophyll production and preventing yellowing between leaf veins. Dissolve one teaspoon in a gallon of water and apply monthly during growing season. This simple supplement addresses one of the most common micronutrient deficiencies in container-grown plants.
Top-dress with vermicompost every two to three months, adding a two-inch layer across the soil surface. Worm castings provide complete nutrition in slow-release form while dramatically improving soil structure and water retention. They also contain growth hormones and beneficial microbes that supercharge plant health.
Pruning for Maximum Production
Strategic pruning transforms your curry leaf plant from sparse and leggy to full and productive. Each cut you make removes apical dominance—the growing tip’s suppression of side shoots—encouraging your plant to branch laterally. More branches mean more growing points, which translates directly to increased leaf production.
Time major pruning for early spring, just as your curry leaf plant exits dormancy and begins pushing new growth. Cut back up to one-third of the total height, making clean cuts at forty-five-degree angles just above leaf nodes. Use sharp, sterilized pruning shears to prevent disease transmission and ensure clean wounds that heal quickly.
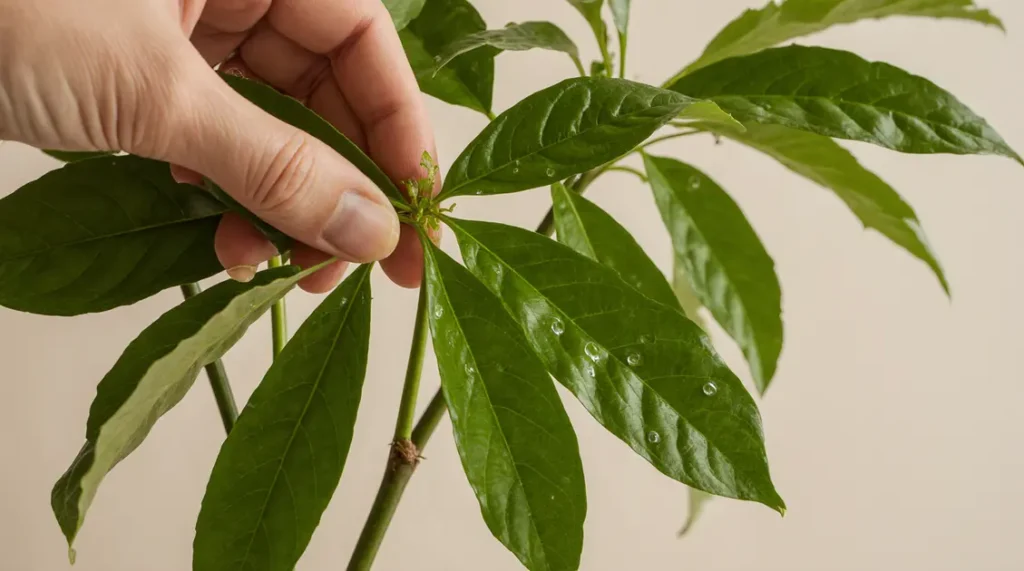
Throughout the growing season, practice continuous pinching. When new shoots reach six to eight inches, pinch or cut off the top inch or two. This ongoing maintenance keeps your curry leaf plant bushy rather than allowing it to grow tall and sparse. Each pinch generates two or more side branches, exponentially multiplying your harvesting points.
Remove any dead, damaged, or diseased growth immediately, regardless of season. These materials drain energy without contributing photosynthesis while potentially harboring pests or pathogens. Clean cuts prevent problems from spreading to healthy tissue.
Natural Pest Control: Protecting Your Investment
Indoor growing provides inherent pest protection compared to outdoor cultivation, but problems still arise. Vigilance and early intervention prevent small issues from becoming serious infestations that compromise your curry leaf plant’s health and productivity.
Aphids rank among the most common indoor pests. These tiny, soft-bodied insects cluster on new growth and leaf undersides, sucking plant juices and secreting sticky honeydew. Check your curry leaf plant weekly, particularly examining tender new shoots. Catch them early, and a strong water spray dislodges most, followed by insecticidal soap treatment.
Spider mites thrive in warm, dry conditions—unfortunately common indoors during winter. These microscopic pests create fine webbing between leaves and stems while stippling foliage with tiny yellow dots. Maintain adequate humidity as your first defense. If infestation occurs, spray thoroughly with neem oil solution, ensuring complete coverage of leaf undersides where mites concentrate.
Scale insects appear as small brown or white bumps attached to stems and leaves. They’re actually insects protected by waxy shells, making them more challenging to control than soft-bodied pests. Manual removal using cotton swabs dipped in rubbing alcohol works for light infestations. Heavier problems require repeated neem oil applications to suffocate adults while targeting vulnerable newly-hatched crawlers.
Prevention beats treatment every time. Quarantine new plants for two to three weeks before introducing them near your curry leaf plant—this isolation period allows hidden pests to reveal themselves before spreading. Maintain proper watering and fertilization practices because stressed plants become pest magnets. Ensure adequate air circulation using a small fan, which both strengthens stems and creates conditions pests dislike.
Organic Treatment Recipes
Neem oil spray serves as your go-to broad-spectrum organic pesticide. Mix two teaspoons neem oil with one teaspoon mild liquid soap (which acts as an emulsifier) in one quart of water. Shake vigorously before each application and spray thoroughly, coating all leaf surfaces, stems, and soil surface. Apply weekly for three consecutive weeks to break pest life cycles, then monthly as preventative maintenance.
Insecticidal soap targets soft-bodied pests effectively without synthetic chemicals. Combine two tablespoons pure castile soap with one quart water, shaking well. Spray every three to four days until pests disappear. Soap works by breaking down pest cuticles, causing dehydration. Rinse your curry leaf plant with plain water several hours after application to prevent potential soap buildup.
Garlic spray repels many pests while possessing mild fungicidal properties. Blend one entire garlic bulb with one quart water, steep overnight, strain thoroughly, and spray twice weekly. The pungent sulfur compounds deter feeding insects. Your curry leaf plant might smell strongly initially, but the odor dissipates within hours.
Harvesting Your Bounty
Patience pays dividends here. Allow your curry leaf plant to establish for at least six months after purchasing as a sapling before significant harvesting begins. Young plants need time to develop extensive root systems and build energy reserves. Premature heavy harvesting stunts long-term growth and productivity.
When ready to harvest, take entire stems rather than stripping individual leaves. Cut stems where they branch from larger growth, using clean, sharp scissors or pruning shears. This approach encourages branching at the cut point while maintaining your plant’s overall shape. Harvest during the growing season for peak flavor and oil content—morning picking captures maximum aromatic compounds.
Practice sustainable harvesting by never removing more than one-third of your curry leaf plant’s total foliage at once. Distribute harvesting across the entire plant rather than denuding one section. Allow two to three weeks of recovery between substantial harvests. Ironically, regular moderate harvesting actually promotes bushier, more productive growth compared to leaving plants untouched.
Fresh curry leaves store reasonably well using several methods. For short-term use within one week, wrap stems in slightly dampened paper towels and refrigerate in plastic bags. The moisture prevents wilting while cool temperatures slow deterioration. Medium-term storage for two to three weeks involves placing stems in water like cut flowers, covering loosely with plastic bags, and refrigerating.
Freezing preserves leaves excellently for six months or longer. Wash leaves thoroughly, pat completely dry, and freeze in airtight containers or freezer bags. Frozen leaves maintain most of their aromatic qualities and can be used directly from frozen in cooking. While drying remains an option, it significantly reduces flavor compared to fresh or frozen leaves—use this method only as a last resort.
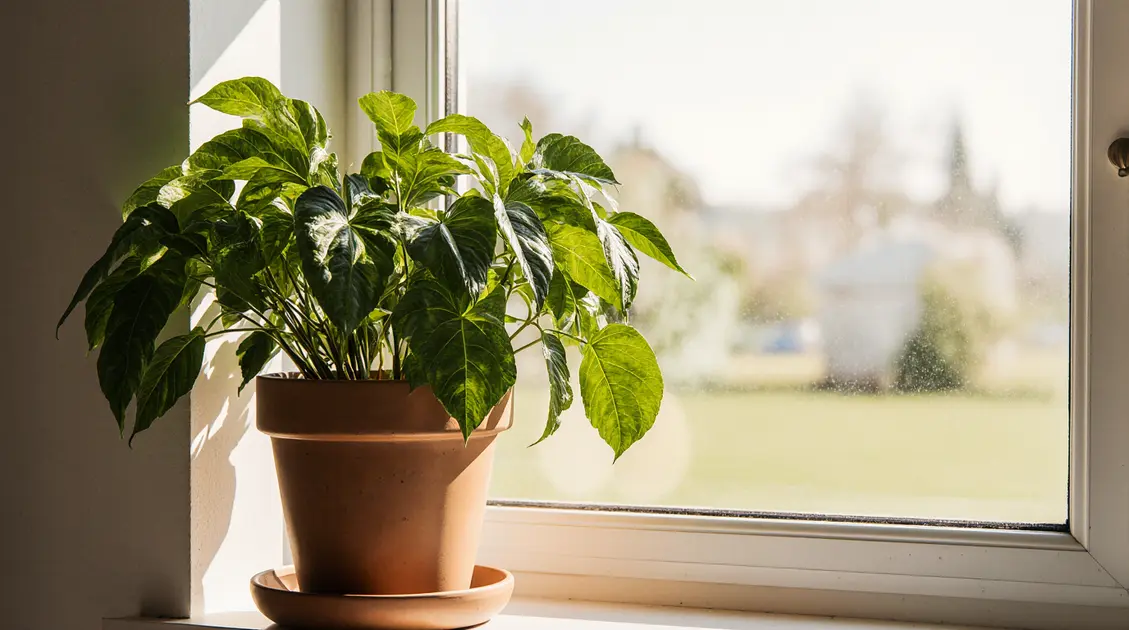
Your patient nurturing has transformed a small plant into a productive kitchen companion. That curry leaf plant sitting on your windowsill represents more than just convenience—it embodies your connection to traditional flavors, your commitment to fresh ingredients, and your satisfaction in growing something useful with your own hands. Each time you harvest those fragrant stems and hear them sizzle in hot oil, you’ll appreciate the journey that brought fresh curry leaves permanently into your home cooking repertoire.