Find the correct spinach spacing to maximize garden yield.
Have you ever wondered if the secret to a bountiful spinach harvest isn’t just about good soil and plenty of sun, but something far simpler, yet often overlooked? What if a seemingly minor detail like spinach spacing could actually boost your yields by 30% or more, transforming your garden from mediocre to magnificent? Many gardeners cram their leafy greens together, believing more plants equal more harvest. However, this common misconception can lead to stunted growth, increased disease, and ultimately, disappointing results. Understanding optimal spinach spacing is crucial for robust growth, healthier plants, and a truly impressive yield. Let’s dive into the data-backed science and practical tips that will revolutionize your spinach patch.
Table of Contents
Tools & Soil Requirements
Cultivating a thriving spinach patch begins with the right foundation. You’ll need a few essential tools: a hand trowel for precise planting, gardening gloves to protect your hands, and a watering can or hose with a gentle spray nozzle. For soil, spinach thrives in loamy, well-draining soil with a pH between 6.0 and 7.0. This means a rich, crumbly earth that allows roots to breathe while holding adequate moisture. Consider amending heavy clay soils with compost or peat moss to improve drainage and aeration. For sandy soils, compost will help retain moisture and nutrients. Spinach prefers cool climates, ideally between 50-70°F (10-21°C), making it an excellent spring or fall crop. If you’re a city dweller with limited space, don’t despair! Spinach adapts beautifully to container gardening, provided you use a high-quality potting mix and ensure ample drainage.
Best Planting Season & Timing
Timing is everything when it comes to spinach. This cool-season superstar is best planted in early spring as soon as the soil can be worked, or in late summer for a fall harvest. Avoid planting spinach in the peak of summer heat, as high temperatures (above 75°F/24°C) will cause it to bolt, sending up flower stalks and turning its leaves bitter. Spinach seeds typically germinate in a speedy 7-10 days, which is remarkably faster than many other common garden vegetables, offering quicker gratification for eager gardeners. From planting to harvest, you can expect mature leaves in just 30-45 days, making it one of the quickest crops to yield an edible harvest. For a continuous supply, consider succession planting – sowing new seeds every 2-3 weeks during its ideal growing seasons.
Step-by-Step Planting Instructions
Cultivating perfect spinach is an art and a science. Follow these steps for a guaranteed bountiful harvest:
Prepare Your Soil Bed
Before you even think about seeds, prepare your soil. Loosen the top 6-8 inches of soil and incorporate 2-4 inches of well-rotted compost. This creates that ideal loamy, nutrient-rich environment spinach craves. For urban gardeners, choose a container at least 6-8 inches deep and wide, filled with a premium organic potting mix.
Sow Your Seeds Correctly
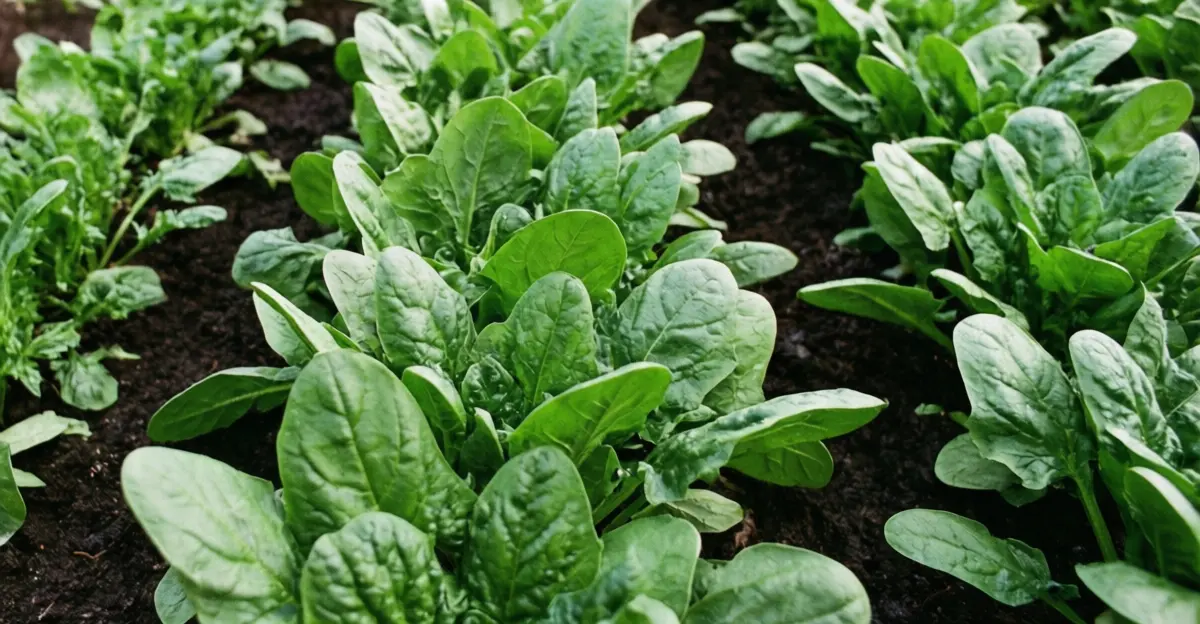
Using your hand trowel, create shallow furrows about 1/2 inch deep. Now, here’s where spinach spacing becomes critical: sow seeds 1-2 inches apart within the rows. If you’re aiming for larger, individual plants, space them 4-6 inches apart initially. For a “cut-and-come-again” harvest, closer spacing of 1-2 inches will encourage more tender, baby leaves.
Water Gently After Planting
Immediately after sowing, gently water the soil. A watering can with a fine rose attachment is ideal to avoid displacing the tiny seeds. Keep the soil consistently moist, but not waterlogged, until germination. Proper moisture is key to successful germination and early growth.
Thinning for Optimal Growth
Once your spinach seedlings have developed their first true leaves (usually 2-3 inches tall), it’s thinning time! This is perhaps the most crucial step for maximizing your yield through smart spinach spacing. Thin plants to stand 4-6 inches apart for a full-sized harvest. For baby spinach, you can thin to 2-3 inches apart. Don’t discard the thinnings; they’re delicious in salads! This critical step ensures each plant has access to adequate light, water, and nutrients, preventing competition and promoting robust growth.
Mulch for Moisture & Weed Control
Once seedlings are established, apply a 1-2 inch layer of organic mulch, such as straw or shredded leaves. This helps retain soil moisture, suppresses weeds (which compete for resources), and keeps the soil cool – conditions spinach absolutely loves.
Plant Care Essentials
Consistent care is the cornerstone of a vibrant spinach patch. Spinach demands consistent moisture, particularly during dry spells. Aim for about 1 inch of water per week, either from rainfall or irrigation. The key is deep, infrequent watering rather than shallow, frequent sprinkles. Spinach is a sun-lover but can tolerate partial shade, especially in warmer climates where it can help prevent bolting. Ideally, target 3-6 hours of direct sunlight. As a cool-season crop, spinach thrives in USDA Hardiness Zones 2-9, given appropriate planting times. The ideal soil pH, as mentioned, is between 6.0 and 7.0, which you can test with an at-home kit. Fertilizing every 3-4 weeks with a balanced organic fertilizer or a nitrogen-rich liquid feed will bolster leaf growth, especially if your soil is less than ideal.
Best Varieties & Companion Plants
There’s a spinach variety for every gardener! ‘Bloomsdale Long Standing’ is a classic, known for its crinkly, dark green leaves and bolt resistance. For those in warmer regions, ‘Tyee’ is an excellent choice, proving more heat tolerant. If you’re growing in containers or prefer baby greens, ‘Space’ is a fast-growing, smooth-leaved option. Don’t forget their leafy cousin, how to grow swiss chard, which offers similar benefits and extends your leafy green season.
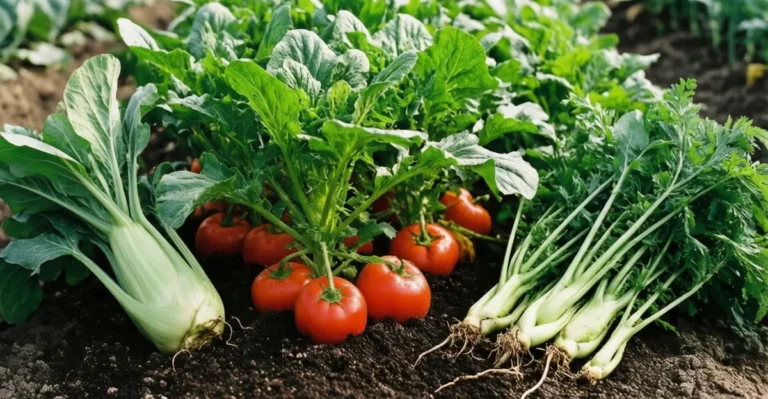
Spinach benefits greatly from companion planting. Radishes and lettuce make excellent neighbors, as they share similar growing requirements and mature quickly, clearing space for your spinach. Marigolds and nasturtiums can act as natural pest deterrents, while beans and peas can fix nitrogen in the soil, enriching it for your hungry spinach. Avoid planting spinach near fennel, which can inhibit its growth.
Landscape Uses & Harvest Tips
Spinach isn’t just for eating; it can also be a delightful addition to your garden aesthetic! Use its vibrant green foliage as an edible border around flower beds or interplant it with ornamental kales for a textured, functional display. It thrives in containers, making it perfect for balconies or small patios. For harvesting, the “cut-and-come-again” method is fantastic for a continuous supply. Simply snip the outer, larger leaves with scissors, leaving the inner leaves to continue growing. This not only encourages more production but also maintains the plant’s health. For a one-time harvest, cut the entire plant at the base. Harvest in the morning after the dew has dried for the freshest, most flavorful leaves.
Common Pests & Diseases to Avoid
Even with perfect spinach spacing, pests and diseases can strike. Keep an eye out for aphids, which can be dislodged with a strong spray of water or treated with insecticidal soap. Leaf miners create squiggly tunnels in leaves; remove affected leaves promptly. Downy mildew, a fungal disease, manifests as yellow spots on top of leaves and fuzzy gray mold underneath. Ensure good air circulation and avoid overhead watering to prevent it. Resistant varieties and rotating your crops can significantly reduce disease pressure. Organic pest control methods, like introducing beneficial insects such as ladybugs, are an eco-friendly approach.
Seasonal Maintenance & Overwintering
Maintaining your spinach throughout its growing season is fairly straightforward. Keep beds weed-free to minimize competition, and continue consistent watering. As temperatures rise in late spring/early summer, spinach will likely bolt, signaling the end of its useful harvest. For overwintering in milder climates (Zones 6-9), you can plant a late-season crop. Covering them with a layer of straw or a cold frame can protect them from light frosts, allowing for a surprising early spring harvest. In colder zones, it’s best to enjoy your fall crop and prepare for new plantings in spring. Preparing the soil, ensuring proper spinach spacing, and diligent care will yield fantastic results.
Conclusion
Mastering spinach spacing is a game-changer for any gardener, moving beyond guesswork to data-backed techniques that maximize your harvest. From preparing the perfect loamy soil to strategically thinning your seedlings, every step contributes to stronger, healthier plants and an abundant yield. We’ve explored optimal planting times, essential care tips, and creative ways to incorporate spinach into your garden, ensuring you avoid common pitfalls. Now, armed with this comprehensive guide, there’s nothing stopping you from cultivating the most delicious, home-grown spinach you’ve ever tasted. So, get out there, put these tips into practice, and watch your garden flourish! We’d love to see your successful spinach patches – share your photos and stories with us! Ready to explore other edible delights? Check out our full guide on spinach spacing.
FAQs
Q1: Can I grow spinach in containers?
A1: Absolutely! Spinach is an excellent container plant. Choose a pot at least 6-8 inches deep and wide, and ensure good drainage. Use a high-quality organic potting mix and adjust your spinach spacing to ensure each plant has enough room.
Q2: Why is my spinach bolting?
A2: Spinach usually bolts due to high temperatures or long daylight hours. It signals the plant is putting its energy into producing seeds rather than tasty leaves. Try planting earlier in spring or later in fall, and consider partial shade during hot afternoons.
Q3: How often should I water spinach?
A3: Spinach needs consistent moisture. Aim for about 1 inch of water per week, ensuring the soil remains moist but not waterlogged. Check the soil regularly; if the top inch feels dry, it’s time to water.
Q4: Can I save spinach seeds for next year?
A4: Yes, if you let your spinach bolt and go to seed, you can collect them. Ensure the seeds are fully mature and dry before storing them in a cool, dark place. However, be aware that seeds from hybrid varieties might not grow true to the parent plant.
Q5: What’s the difference between “cut-and-come-again” and single harvest?
A5: “Cut-and-come-again” involves harvesting outer leaves as needed, allowing the plant to continue producing, ideal for a longer harvest window. Single harvest means cutting the entire plant at its base, which usually yields a larger quantity at once but ends the plant’s production. The choice depends on your preference and desired yield from your spinach spacing.