The Ultimate Guide to Starting Mint Seeds Successfully: Grow Fresh Aromatics at Home
You know that feeling when you brush past a plant in the garden, and the air is suddenly filled with a cool, sharp sweetness? That is the scent of memory. For many of us, the smell of fresh mint brings back lazy summer afternoons, iced teas on the porch, or that first triumphant garnish on a home-cooked meal.
There is a quiet, specific magic in watching a speck of dust—because that is exactly what a mint seed looks like—unfold into a lush, fragrant bush that feeds your kitchen and your soul. It isn’t just about gardening; it is about cultivating a sanctuary of freshness right where you live.
If you have been looking for a definitive Guide to Starting Mint Seeds Successfully, you are in the right place. While many people buy nursery starts, growing from seed offers a level of satisfaction—and variety—that big-box garden centers simply can’t match. Let’s get your hands dirty and turn those tiny seeds into an aromatic abundance.
Table of Contents
Why Grow Mint from Seed?
You might be wondering, “Why bother with seeds when I can buy a plant for five dollars?” It is a fair question. Mint is famously vigorous, and nursery plants are convenient. However, when you rely on store-bought starts, you miss out on three critical advantages.
1. The Cost-Effectiveness Ratio
A single packet of seeds costs a fraction of the price of a potted plant and contains hundreds of potential plants. If you want to line a walkway with peppermint or fill multiple containers on a balcony, seeds are exponentially cheaper. You get an entire garden for the price of a cup of coffee.
2. Access to Rare Varieties
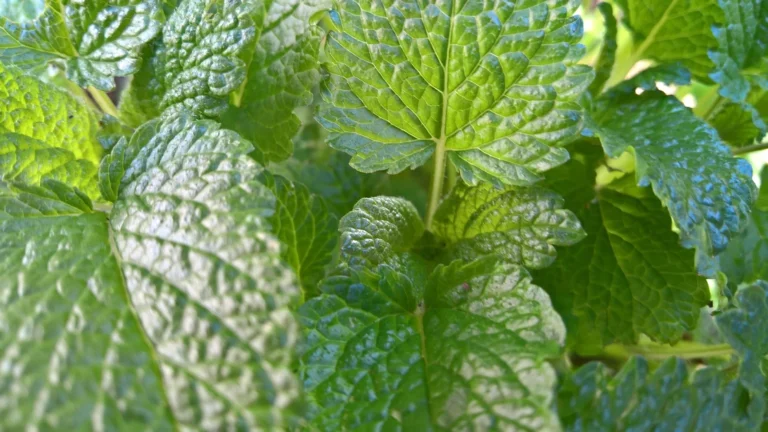
Garden centers usually stock “Generic Mint” or maybe “Spearmint.” When you browse seed catalogs, a new world opens up. You can find Chocolate Mint, which really does smell like a peppermint patty; Apple Mint, with its fuzzy leaves and fruity notes; or true Lemon Mint. Learning the Guide to Starting Mint Seeds Successfully unlocks flavors you will never find in the produce aisle.
3. Disease and Pest Control
Nursery plants are often notorious vectors for pests. Bringing a store-bought plant home is the easiest way to accidentally introduce spider mites, aphids, or fungal gnats to your existing houseplants. Starting from seed ensures you are beginning with a sterile, clean slate.
Understanding Mint Seeds: What You Need to Know Before You Start
Before you rip open the seed packet, you need to understand the biology of what you are working with. Mint seeds are not like bean or sunflower seeds. They are incredibly small—almost dust-like—and they have specific needs that, if ignored, will lead to an empty pot.
The Germination Challenge
Patience is your best tool here. While some vegetables pop up in 3 days, mint takes its time.
- Time to Germinate: Typically 10 to 15 days, but it can take up to 3 weeks in cooler temperatures.
- Viability: Mint seeds lose viability relatively quickly compared to other seeds. Always use fresh seeds packed for the current year.
Indoor vs. Outdoor Sowing
Can you throw mint seeds in the garden and hope for the best? Technically, yes. Should you? Probably not. Because the seeds are so tiny, they wash away easily in rain and are easily buried too deeply by shifting soil. For the highest success rate, start your mint seeds indoors. This gives you control over humidity, light, and temperature the three pillars of germination.
Gathering Your Supplies
Preparation is 90% of the battle. You don’t need a high-tech greenhouse, but you do need the right gear to mimic the conditions mint loves.
Essential Planting Ingredients & Tools
Below is a breakdown of exactly what you need. Don’t improvise on the soil mix; heavy garden soil will suffocate these tiny seeds.
| Ingredient/Tool | Specifications | Purpose |
| Potting Mix | Soilless seed-starting mix (sterile) | Ensures fine texture so weak roots can push through. Prevents “damping off” disease. |
| Containers | Shallow trays or small 3-inch pots | Deep pots hold too much water, risking rot. Shallow soil warms up faster. |
| Grow Lights | Full-spectrum LED or fluorescent | Mint seedlings get “leggy” (tall and weak) instantly without strong overhead light. |
| Heat Mat | Adjustable plant heating mat | Maintains soil temp at the ideal 70°F – 75°F (21°C – 24°C). Cold soil = dormant seeds. |
| Spray Bottle | Fine mist sprayer | A watering can is too heavy; it will displace the seeds. Misting keeps them in place. |
| Humidity Dome | Plastic cover or clear cling film | Traps moisture to soften the seed coat, essential for germination. |
Step-by-Step Guide to Starting Mint Seeds Successfully
This is the core of your journey. Follow these steps closely, especially the rule about light.
Step 1: Preparing the Soil
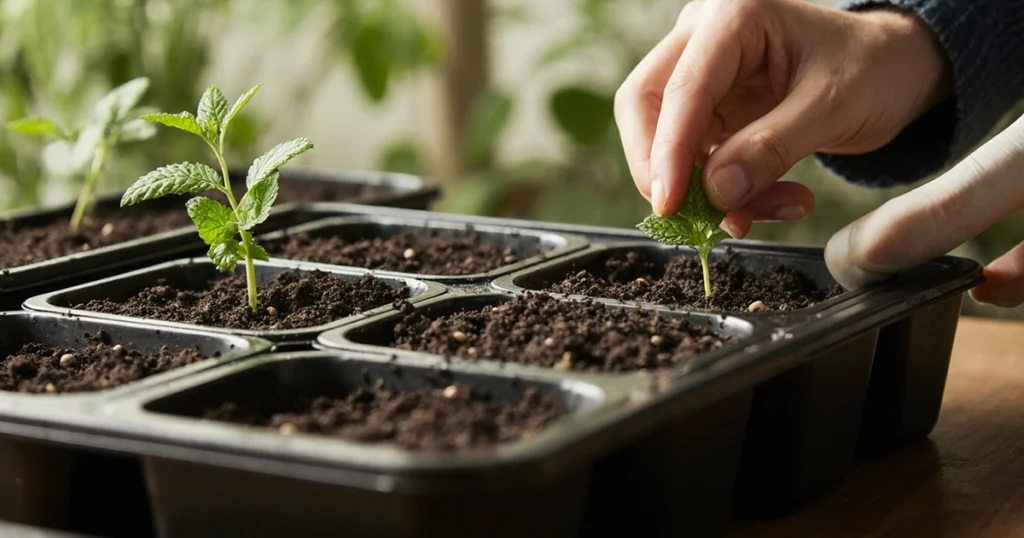
Many beginners make the mistake of filling the pot with dry soil and watering it afterward. This usually results in a swampy mess where the soil floats. Instead, put your seed starting mix in a bucket and add warm water. Mix it with your hands until it feels like a wrung-out sponge. It should be damp and dark, but not dripping wet. Fill your pots with this pre-moistened mix and tap them gently on the table to settle the air pockets.
Step 2: Sowing the Seeds (The Golden Rule)
This is the most critical part of the Guide to Starting Mint Seeds Successfully: Mint seeds need light to germinate. Do not bury them.
- Sprinkle 3-4 seeds on the surface of your pre-moistened soil.
- Gently press them down with your fingertip just so they make contact with the soil.
- Do not cover them with more soil. If you bury them, they will likely remain dormant and never sprout.
Step 3: Creating the Greenhouse Effect
Once your seeds are pressed onto the surface, mist them heavily with your spray bottle. Then, cover the pot with your humidity dome or a piece of clear plastic wrap. This locks in the moisture so the seeds don’t dry out.
- Pro Tip: If you see condensation on the inside of the plastic, you are doing it right. If it looks dry, mist again.
Step 4: Location and Light
Place your covered pots on the heat mat (if you have one) or in the warmest spot in your house.
Light: Even before they sprout, some ambient light is good. Once you see the first speck of green, remove the plastic cover immediately and place them under your grow lights (or in a very sunny south-facing window).
Caring for Your Mint Seedlings
Congratulations, you have sprouts! But the danger zone isn’t over. Seedlings are fragile. Here is how to keep them alive.
Watering and Moisture Management
Mint loves water, but seedlings hate drowning. You need to walk a fine line.
- Bottom Watering: The best way to water seedlings is to place the pot in a tray of water and let the soil wick moisture up from the bottom. This prevents the delicate stems from being knocked over by a stream of water from above.
- The Touch Test: Touch the soil surface daily. If it feels dry, water. If it is soggy, let it breathe.
Thinning the Herd
You planted 3-4 seeds per pot, and maybe all of them sprouted. It hurts to do this, but you must thin them. If you let them all grow, they will compete for nutrients, and you will end up with three weak plants instead of one strong one. Choose the strongest, best-looking seedling in the pot and snip the others off at the soil line with scissors. Do not pull them out, or you might damage the roots of the one you want to keep.
Preventing Leggy Growth
If your mint looks like bean sprouts—long, white stems with tiny leaves at the top—it is starving for light.
- The Fix: Lower your grow lights. The lights should be just 2 or 3 inches above the tops of the plants. If you are using a windowsill, rotate the pot 180 degrees every day so the plant doesn’t lean permanently toward the glass.
Transplanting: Moving to the “Forever Home”
Once your mint has 2 or 3 sets of “true leaves” (leaves that actually look like mint leaves, not just the initial round sprouts), it is ready to move on.
Hardening Off
You cannot just take an indoor plant and put it outside in the wind and sun. It will go into shock and die. You need to “harden it off.”
- Day 1-3: Put the plants outside in a shady, sheltered spot for 2-3 hours, then bring them back in.
- Day 4-6: Give them dappled sunlight and leave them out for half the day.
- Day 7: Leave them out overnight (unless there is frost).
- Day 8: Plant them in their final spot.
Containment Strategy
You have probably heard the warnings, but they bear repeating: Mint is invasive. It spreads via underground runners called rhizomes. If you plant mint directly in your garden bed, it will take over. It will choke out your flowers, your vegetables, and your lawn.
- The Solution: Always plant mint in a container. If you want the look of it growing in the ground, plant it in a plastic pot, dig a hole, and bury the entire pot in the ground, leaving the rim sticking up about an inch above the soil surface. These barriers prevent the rhizomes from escaping.
Troubleshooting Common Issues
Even with the best Guide to Starting Mint Seeds Successfully, things can go wrong. Here is how to fix them.
“Why are my mint seeds not germinating?”
If it has been 3 weeks and you see nothing:
- Did you bury them? Remember, they need light.
- Was it too cold? If the room is below 65°F (18°C), germination slows to a halt.
- Old Seeds: If the packet was sitting in a hot garage for two years, the seeds are likely dead.
Dealing with Pests
Mint is tough, but aphids think it is delicious. If you see sticky residue on leaves or tiny green bugs:
- Blast them: A strong stream of water usually knocks them off.
- Soap: Mix a few drops of dish soap with water and spray the leaves (undersides too).
- Neem Oil: For persistent infestations, organic Neem oil works wonders.
White Powdery Mildew
If your leaves look like they have been dusted with flour, you have mildew. This happens when air circulation is poor and leaves stay wet.
- Fix: Trim back the affected leaves to increase airflow. Water the soil, not the leaves.
Frequently Asked Questions (FAQ)
Here are the most common questions beginners have when following a Guide to Starting Mint Seeds Successfully.
Q1: How long does it take for a Guide to Starting Mint Seeds Successfully to show results?
From the day you sow the seed, expect to see germination in 10-15 days. You will likely be able to start harvesting small leaves for tea in about 60 to 90 days. A full, bushy plant usually matures by the 3-4 month mark.
Q2: Can I grow mint seeds in a glass of water?
No. You are confusing seeds with cuttings. You can take a stem of mint and root it in water, but mint seeds need a solid medium (soil) to sprout. If you put seeds in water, they will simply rot.
Q3: Do mint seeds need cold stratification?
Stratification (simulating winter) is not strictly necessary for common mint, but it can help. If you have had trouble germinating in the past, try putting your seed packet in the refrigerator for a week before planting. This temperature shock can sometimes “wake up” the embryo.
Q4: Is it hard to follow a Guide to Starting Mint Seeds Successfully for beginners?
Not at all. The hardest part is the microscopic size of the seeds. Once you get past the germination stage, mint is arguably the easiest, most resilient plant you can grow. It is famously hard to kill once established.
Wrapping Up: Your Aromatic Journey Begins
Growing mint from seed is a practice in patience that pays off in years of flavor. By following this Guide to Starting Mint Seeds Successfully, you aren’t just gardening; you are setting up a perennial supply of fresh ingredients.
Imagine the difference in your cooking when you can step onto your balcony or walk into your kitchen and pinch off a sprig of mint that you nurtured from a speck of dust. The flavor is more intense, the leaves are fresher, and the satisfaction is unbeatable.
Don’t let the tiny size of the seeds intimidate you. Grab your potting mix, set up your light, and get sowing. Your future cups of tea, summer mojitos, and fresh salads are waiting in that packet of seeds.
Ready to start? Pick up your seeds today and let nature do the rest.